Saturday, February 25, 2012

It Started on Valentine's

For those of you who've been following me since the journey started, you'll remember that my first baking adventure revolved around making a delicious chocolaty symbol of love for my boyfriend for Valentine's Day. A year later, I couldn't help but reflect on the past year and realize that so much has changed since then. I started out as someone who just wanted to learn more about baking, someone taking on a new hobby, now I've transformed into a student of baking and pastry and dreaming and aspiring towards making it a more integral part of my life.


On the non-baking front, I moved from girlfriend to fiance, and I'm sure baking had a small part to play in all that. Not just because he has been the chief taste tester and could look forward to fresh baked goods on a weekly basis, but also because I believe baking has made me a happier person, and helped me relieve the week's stress. As a part of this certificate course in Pastry Making  and Cake Decorating, I have practicals twice a week but I have to say, I much prefer baking on my own terms. I like selecting the specific recipes I'd like to do, and adding a little something here and there. The school kitchen does have its advantages though, like industrial mixers which can mix, whisk and knead. They are putting the hand mixer I have at home to shame and making me hunger and salivate every time I see a Kitchenaid mixer. I MUST get one, its not an if, its a when.


Since we've been together, my fiance and I have never been out on Valentine's Day, mostly because the  thought of a crowded restaurant doesn't seem that romantic to him. This time we decided to give going out a try but of course, I still had the inkling to make him something, surprise him with a chocolaty gift. I decided on breakfast in bed and came upon this recipe from Two Peas and Their Pod for a Chocolate Dutch Baby. This recipe also gave me an excuse to buy a cast iron skillet which I'd been wanting for quite sometime. Immediately after I bought it I came home and began searching for recipes to try in my new skillet.


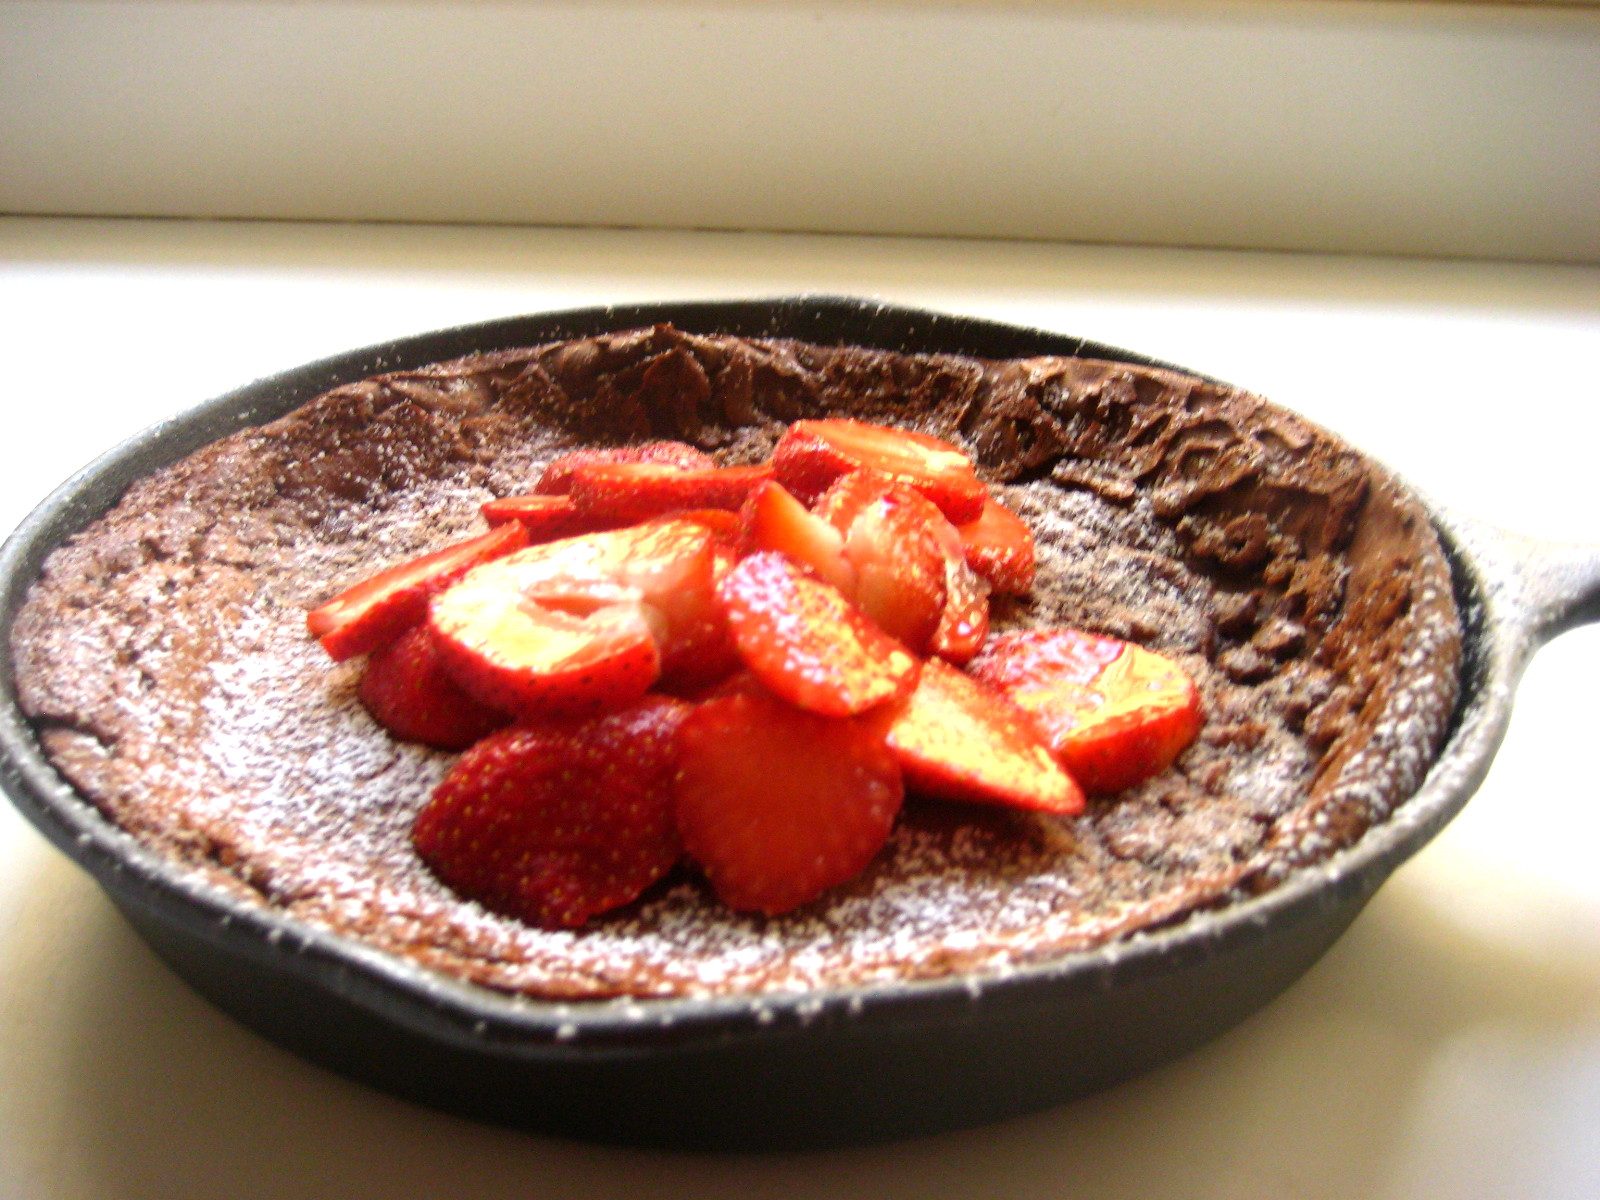
For those of you unfamiliar with Dutch Babies, they're like pancakes which are made in the oven. This particular recipe is made by heating the skillet with melted butter in it, blending all the ingredients in the blender, pouring them into the skillet and putting the hot skillet in the oven. After baking I topped it with sliced strawberries and dusted it with powdered sugar. It was super easy, the perfect recipe for a quick Valentine's breakfast.

I totally surprised Anthony and I liked it so much, I'm looking forward to trying other dutch babies. The only thing I'd add is a little dollop of whipped cream, that would've made it perfect. 

Wednesday, November 9, 2011

Cake Decorating

In the last few weeks we've started to concentrate on the cake decorating aspects of the course. We've been doing simple cake decorating techniques. Check out the cakes I've done so far. I think we can agree that they're all an improvement on my first cake decorating attempt.

CAKE #1


CAKE #2


CAKE #3


CAKE#4 which I did tonight


Memories of F&N Class

No I haven't given up on baking or the blog. October was a super crazy busy month for me because my dance company, Dance Theatre Xaymaca, staged their 16th Season of Dance on October 29 and 30. Rehearsals for the performances and the performances themselves pretty much kidnapped all my time, but I'm back now.


When I was in 3rd form in high school we had to take food and nutrition class. There were two desserts we made that I remember. The plantain tarts because they tasted really good and the donuts because we accidentally forgot the sugar and ended up with something similar to fried dumplings. These memories came back when we made these same treats in my baking class. But this time the donuts were divine. I like simple glazed donuts, no fillings, no fandangles. The donuts were tender and delicious and the glaze was to die for with a little tups of lemon mmm. We tried different shapes, round, twist and pretzel shaped. The plantain tarts were pretty good too.


Unfortunately some of the donuts came out a little dark. This is because while in the deep fryer its important to flip them unto the other side very quickly. Being a first-timer I didn't flip them as swiftly as required so the last ones I turned ended up dark on one side. They still tasted great. I think what I need to do is practice doing these over and over at home (wink, wink).


Monday, September 26, 2011

It's Not Delivery, It's Me!

Apart from the hectic schedule, the expense of buying tools and ingredients and the hassles of dealing with the university's administration, I'm really enjoying the course I'm taking. Here's a look at some of the goodies we made last week.


Pizza - I chose to make mine Hawaiian. I can't wait to try a thin crust version at home.
We also made Italian bread (not pictured) which is made with the same dough as the pizza crust. After the bread baked we sliced it in half and slathered garlic butter in the middle then wrapped it in foil and let the flavour make love to the bread. Mmm mm good!


Chinese Almond Cookies - easy to make crispy cookies garnished with almonds with a hint of almond extract in the dough as well. A very yummy little treat. Perfect for making with kids actually. I'll keep that in mind for when I have some.


Spritz Cookie - a simple piped butter cookie garnished with dried cherries. We made 3 different shapes.


Banana Nut Bread - a simple, timeless, homey, classic. It was moist, delicious and oozing with flavour.

Tuesday, September 20, 2011

War of the Cinnamon Buns

Last Friday in class we were scheduled to make cinnamon buns and I couldn't help but wonder whether the ones I'd make in class would beat the ones I made at home (see Move Over Cinnabon!). We were told to bring extra sugar, raisins and some store-bought fruit filling. It soon became apparent to us that we weren't just making cinnamon buns but many different shapes and variations with same basic dough. The sweet yeast dough was made, allowed to rise and divided in four pieces. Each piece was used to make a different type of pastry. We made the original cinnamon bun shape, a coffee cake ring shape, a twisted version which was wrapped into several different shapes and a braid with fruit filling in the middle. These were baked in the oven and brushed with a honey syrup then lightly drizzled with a glaze made from icing sugar, lemon flavor and water.


The honey syrup added that irresistible sheen to the pastry. It also added more sweetness to the pastry than in my version of the cinnamon bun. These cinnamon buns were what Jamaican's refer to as "Sugar Bun" while the ones I made previously were more like what you'd get at Cinnabon, but they were both delicious. All the variations were yummy. 


Friday, September 9, 2011

Taking it to the next level

Its been about 7 months since I started baking and blogging and I've been having such a wonderful time that I decided to take my baking to another level. I've enrolled myself in a 1 year part-time course in pastry making and cake decorating. The classes started this week. We have practicals every Wednesday and Friday, so instead of my usual tales of weekend baking, I'll be blogging about all the things i'm learning in class with the occasional weekend project. I hope that's OK with you my valued readers.

Today we had our very first practical class and I'm loving it already. I happened to luck out and pick the most awesome, cool girls in the class to partner with. Today we made dinner rolls, our first yeast dough project. We made them in three shapes: round, knot and double knot. Our rolls came out soft and delicious. We couldn't stop "sampling" them when they were warm and fresh from the oven.

Wednesday, September 7, 2011

My Cheesecake Brings All My Friends to the Yard

This week I decided to try my all time favorite dessert. Can anyone guess what that is? If you've been reading my blog at all you'd know that I love cream cheese, in fact I love all cheese so it should be no surprise to you that my favorite dessert is cheesecake. I've tasted many, many cheesecakes, so I consider myself an expert in sensory evaluation of them, but when it comes to baking them I'm a complete novice. This made me nervous. I mean who wants to screw up their favorite thing to eat, not me! Additionally, I've tasted a lot of disappointing cheesecakes. Ones that missed the mark by having the wrong texture, being too cakey, too sweet, not sweet enough and the list of faults goes on and on. I didn't want to be one of those. I wanted mine to be great!


After reading other bloggers' raving reviews about Dorie Greenspan's recipe for Tall and Creamy Cheesecake, I decided to use her recipe to bake my very first cheesecake.I prepared the crust by combining graham cracker crumbs, sugar and butter to make the crust and fitting into into my buttered spring-form pan which was double wrapped in tin foil. I placed the tin in the freezer. I met upon a major setback when I preheated the oven and realized it wasn't heating up enough. Noooo! I felt pretty disappointed. But the next day I woke up with a new sense of determination, mixed up my batter, got in the car and drove over to my parents house and used their oven to bake it. I decided to make the lime version of Dorie's cheesecake because I like the brightness that a little citrus adds to desserts. So in addition to mixing together the cream cheese, sugar, vanilla, eggs, sour cream, heavy cream and salt, I also added lime juice and lime zest. The crust baked at 350 for 10 minutes, then after it cooled I poured the filling into it and baked the cheesecake in a water bath at 325 for an hour and a half. Then the cheesecake was left in the water bath with the oven door slightly opened for another hour, then I removed it and cooled it on a wire rack.


The hardest part about making cheesecake is the waiting. After baking for an hour and a half, sitting for another hour in the slightly cracked oven and then cooling on the wire rack, it then has to chilled for at least 4 hours! This felt like the longest wait of all time. At around 9pm that night I just had to go and take a small sliver to see how my masterpiece turned out. It was wonderful! the texture was perfect! Really creamy! The lime was such a wonderful addition and gave it a little zing. It was just the right amount of sweet. It was lovely. It was so lovely that I invited my friends to come over and eat it before I ate it all myself.

So not only did my cheesecake turn out great but it inspired a gathering of great friends laughing and talking in my kitchen for a few hours last night. The cheesecake got rave reviews, and I had amazing company. Not only did I accomplish making my first cheesecake but I brought friends together, which doubles the benefits!